Other Blog Posts
- 15 Sep 2020» Laravel and Pusher Chatroom App Part 6
- 14 Sep 2020» Laravel and Pusher Chatroom App Part 5
- 13 Sep 2020» Laravel and Pusher Chatroom App Part 4
- 12 Sep 2020» Laravel and Pusher Chatroom App Part 3
- 11 Sep 2020» Laravel and Pusher Chatroom App Part 2
- 10 Sep 2020» Laravel and Pusher Chatroom App Part 1
- 01 Feb 2018» 10 Things I've Learned about Drupal 7
- 27 Jan 2018» Greater Understanding
- 20 Jan 2018» Working with JSON
- 13 Jan 2018» Expanding JavaScript Knowlege
- 05 Jan 2018» Hiring Someone with 0 Years Experience
- 30 Dec 2017» New Year Resolutions
- 23 Dec 2017» Twitter Bot
- 16 Dec 2017» Twitter Search
- 22 Oct 2017» TimeOut
- 21 Sep 2017» My First Week of Bootcamp
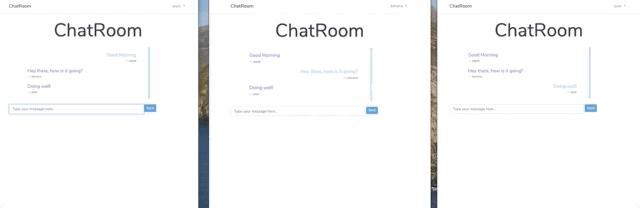
A Simple Chatroom Application with Laravel and Pusher(Part 5)
A quick review… I came across an example for a chatroom app that utilized Laravel and Pusher, a connection and messaging app that provides real-time content relay. It also touches on several features within Laravel, such as database connection, model generation, Vue.js integration, and eventing. If you haven’t started yet, go to Part 1 in this series to get started.
Creating the Vue Components
In your resources/js/components folder, create two new files and call them ChatMessages.vue and ChatForm.vue. You’ll notice there is already an example component and this is because Laravel comes out of the box with Vue. Learn more about Vue here. Let’s create our ChatMessages.vue component and this can vary, mine looks like this:
This component takes and array of messages as props: and loops through them using the v-for="message in messages" directive.
Next, the ChatForm.vue file. Again, this can vary but mine is as follows:
<template>
  <div class="input-group">
        <input id="btn-input" type="text" name="message" class="form-control input-sm" placeholder="Type your message here..." v-model="newMessage" @keyup.enter="sendMessage">

        <span class="input-group-btn">
            <button class="btn btn-primary btn-sm" id="btn-chat" @click="sendMessage">
                Send
            </button>
        </span>
    </div>
</template>

<script>
    export default {
        props: ['user'],

        data(){
            return {
                newMessage: ''
            }
        },

        methods: {
            sendMessage() {
                this.$emit('messagesent', {
                    user: this.user,
                    message: this.newMessage
                });

                this.newMessage = ''
            }
        }
    }
</script>
A few things going on in this component. First, we accept the authenticated user as props. Second, the newMessage data is bound to the input field and the sendMessage() is called when the send button is clicked or the enter key is pressed. sendMessage() triggers a messagesent event to send the user message to the root Vue instance. Finally, the input field is cleared by returning newMessage: ''`.
With the components created, we will now register them in the root Vue instance located in the resources/js/app.js. Looking at this file you’ll notice the example component is registered and we will want to do the same for our components.
Vue.component('chat-form', require('./components/ChatForm.vue').default);
Vue.component('chat-messages', require('./components/ChatMessages.vue').default);
The next thing in this file is to update our vue instance:
const app = new Vue({
    el: '#app',

    data: {
        messages: []
    },

    created() {
        this.fetchMessages();
    },

    methods: {
        fetchMessages() {
            axios.get('/messages').then(response => {
                this.messages = response.data;
            });
        },

        addMessage(message) {
            this.messages.push(message);

            axios.post('/messages', message).then(response => {
                console.log(response.data);
            })
        }
    }
});
In the instance, we are creating a couple of methods to fetch and add our messages using Axios.
In the next post we’ll set up the event listeners. View Part 6 here.